MENU
A properly selected gutter system must efficiently collect water from the roof and direct it away from the building. Therefore, it is not enough to simply choose gutters of a specific diameter and install one downspout at each corner of the building. The number of gutters and downpipes needed is determined primarily by: the roof area, the number and shape of the roof slopes, the length of the gutter sections, and the layout of the drains. The basis for selection is the effective roof area, and the final specifications must be verified in the capacity table for the specific system. Manufacturers’ data may vary, so you must not apply the specifications of one system to another gutter system.

In this article, you’ll learn how many gutters and downpipes you need and how to choose the right ones for your roof. We’ll show you how to calculate the effective roof area, position the outlets, and determine the gutter slope so you can properly plan your gutter system.
Choosing a gutter system begins with checking the dimensions and layout of the roof. The most important factors are the size of the roof surface, the length of the eaves, the roof height, the location of the roof ridges, and the layout of the individual gutter sections. For a simple building with a gable roof, the selection process is easier than for multi-slope roofs, where gutter sections may collect water from different parts of the roof.
To start, it’s a good idea to draw a simple sketch of the roof and mark the lengths of the individual gutter sections, the corners, the planned drain locations, and the path of the downpipes. This allows you to assign each roof section to a specific Gutter section and determine the area from which water will be drained.
Next, you can determine the effective roof area and, based on that, select the appropriate size of gutters and downpipes. For a simple single-family home, the calculation is not complicated. With multi-slope roofs, however, each section of the gutter must be analyzed separately, as they may collect water from slopes of varying sizes.
The choice is also influenced by the material. Systems made of PVC, steel, and titanium-zinc are available. The type of material affects the system’s durability, assembly method, and component dimensions, but it does not, in and of itself, determine hydraulic performance. This depends primarily on the gutter’s cross-section, the diameter of the downpipes, the placement of the drains, and the specifications of the specific system. Therefore, when making a selection, you should consider both the type of roof and the material, as well as the technical specifications of the chosen solution.
Tip! PVC gutters are lightweight and cost-effective, while galvanized steel systems stand out for their rigidity and resistance to temperature changes. Aluminum and titanium-zinc gutters are durable materials that also provide an attractive finish for your gutter system.

Selecting the right gutters and downpipes requires determining the effective roof area—that is, the area from which rainwater will flow into a specific section of the gutter. This value depends on the roof’s dimensions and its slope. Therefore, a formula that takes into account both the horizontal dimensions of the roof slope and its height is used for these calculations.
For roofs with a slope greater than 10°, the following formula can be used to calculate the effective roof area. For roofs with a shallower pitch or flat roofs, check the calculation method specified in the technical documentation for the selected gutter system. Do not automatically apply the same calculation to every roof geometry.
EPD = (B + H/2) × L
where:
To perform the calculation, you therefore need three dimensions: the width of the roof slope in the horizontal projection, its height, and the length of the roof measured along the eave. The width of the roof slope should not be measured diagonally—the dimension in the horizontal projection is used in the formula. For roofs with more complex geometries, calculations are performed for individual sections, depending on which section of the Gutter the water flows into from each section.
Example
Suppose that one roof slope has: B = 4 m, H = 3 m, L = 10 m. Substituting the values into the formula:
EPD = (4 + 3/2) × 10 = 55 m²
The effective roof area assigned to this section of the Gutter is therefore 55 m².
On a gable roof, each roof slope has its own gutter section, so the effective area is calculated separately for each side of the roof. Based on this, you can select the size of the gutter and the diameter of the downpipes needed to install the gutter system. On multi-slope roofs, each roof slope must be assigned to the Gutter section that drains water from it. If a single Gutter section drains water from several slopes, their effective areas must be added together.
Remember! In the NIAGARA gutter system from the Blachy Pruszyński Company, the size of the gutters is selected based on the roof area and configuration. When choosing a solution, you must also consider the number and placement of downpipes. Depending on the roof area, the manufacturer also offers the option of using dual-pipe systems.
Once the effective roof area has been determined, you can select the size of the gutters and the diameter of the downpipes. The key is to compare the calculated value with the specifications of a specific gutter system. You must not select gutters based solely on the roof area or assume that a single size is standard for all single-family homes.
Individual systems differ in dimensions, gutter cross-section, pipe diameter, and capacity. Therefore, the appropriate gutter system should be selected based on the manufacturer’s specifications, taking into account the calculated effective roof area and the planned layout of the downspouts. When assessing capacity, the rainfall intensity specified for the parameters of a given system should also be taken into account. In areas with heavy rainfall, it is advisable to consider larger gutter diameters.
One example is the NIAGARA gutter system from the Blachy Pruszyński Company. For single-family homes, the company offers the 110/90, 125/90, 125/100, and 150/100 systems. The first number indicates the gutter depth, and the second number indicates the downpipe diameter in millimeters. The product line also includes larger configurations designed for other applications.
Remember! Every gutter size and downpipe diameter has a specific flow capacity!
When selecting a specific solution, you should first and foremost consider the system’s basic parameters as well as additional factors related to the roof’s geometry and the method of water drainage:
Remember! Gutters and downpipes should form a complete system. A larger pipe diameter alone does not automatically mean greater performance for the entire system. The individual components must be compatible with one another, and their selection should be based on the specifications of the specific system.
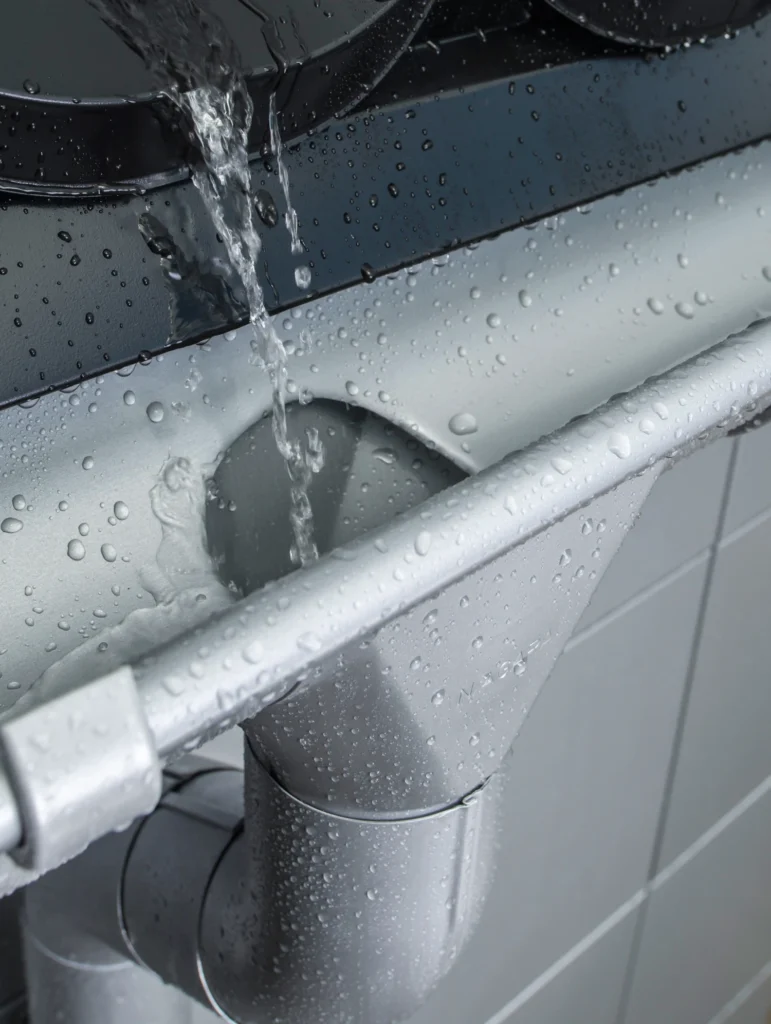
Once the sizes of the gutters and downpipes are known, you can determine the required length of each section and the number of system components. The length of the gutters is calculated by adding up the lengths of all the eaves along which the gutter system is to be installed. In a simple building with a gable roof, gutters are installed along two opposite eaves. If each eave is 10 m long, the total length of the gutters is 20 m. For a more complex roof geometry, each section must be measured separately, taking into account its length, corners, and downspouts.
Based on this, you can determine the number of gutter sections and connecting pieces needed. However, it is not enough to simply divide the total length of the eaves by the standard length of a single gutter. You must take into account the available lengths of the components and how they are connected. In the NIAGARA system, before purchasing, you must check the gutter lengths available for the selected variant and, based on that, determine the number of sections and connectors needed.
To complete the list, you must include components determined by the roof’s geometry and the layout of the gutters. These include, among others, end caps, internal and external corners, downspouts, and gutter hooks. The number of individual components is determined based on the actual layout of the gutters—every corner, connection between two sections, or planned drain outlet should be reflected in the list.
The length of downpipes is calculated separately. For each vertical run, measure the distance from the Gutter outlet to the point where the water is to be discharged. If the downpipe must be routed away from the building facade, the elbows and pipe sections needed to create this route must also be taken into account.
You also need to plan the placement of the downpipe brackets that secure the downpipes. According to the NIAGARA system instructions, the first clamp should be placed 50–100 cm from the eave, and subsequent clamps should be spaced 150–250 cm apart. They should be aligned with the spout outlet. For more complex roofs, it’s a good idea to prepare a separate list for each section of the Gutter and each downspout. This allows you to determine the number of pipes and components needed to complete the Gutter system.
The number of downpipes is determined based on the area served by each drain. If a single drain cannot handle the entire area assigned to it, water may overflow the edge of the Gutter during heavy rainfall. In such a situation, an additional drain with a Downpipe or a larger system configuration must be installed.
In practice! It is generally accepted that a single downpipe can drain water from approximately 10 meters of gutter. For longer sections, assembly of an additional downpipe may be necessary, although the final decision depends on the roof area and the specifications of the specific system.
If the gutter is long, you can divide it into two sections and install a downpipe in the middle. Each downpipe then carries water from a specific section of the roof. However, this does not mean that a single downpipe is always sufficient for one side of the building—the number of downpipes is determined by calculations and the capacity of the selected system.
Good to know! In the NIAGARA system, the manufacturer allows for the use of dual-pipe configurations depending on the roof area. This means that for larger roof areas, the flow can be divided between two downspouts instead of simply increasing the size of a single pipe.
On multi-slope roofs, the number of downpipes may be greater, since individual gutter sections may collect water from different parts of the roof. Each such section must be considered separately.
There is no single universal rule determining the number of downpipes. It depends on the effective roof area allocated to each drain, their placement, and the parameters of the gutter system.
The location of the downspouts should be determined by the layout of the gutters and the direction of water flow. A downspout may be located at the end of the gutter, in its middle, or at another point determined by the division of the roof into drainage zones.
When planning the placement of downspouts, the following must be taken into account:
On a simple gable roof, drains can be placed at the ends of the gutters if this arrangement meets the capacity requirements of the selected system and allows the downpipes to be routed properly. For long eaves, consider placing the outlet in the middle of the Gutter. In this case, the Gutter’s slopes direct water from both sides to a single point. Before choosing a layout, however, you must check what effective roof area will be served by this outlet and whether it falls within the system’s capacity range. On multi-slope roofs, downspouts should be positioned taking into account the direction of water flow from individual slopes, the feasibility of routing the pipes, and the building’s facade elements. The final layout should be based on the manufacturer’s calculations and documentation, rather than solely on ease of assembly.
Note! The placement of downpipes must be planned so that the downpipes run as straight as possible and do not interfere with facade elements. If the chosen drainage location would require numerous changes in the pipe’s direction, it’s worth exploring other solutions.
The gutter slope should be determined in accordance with the instructions for the specific system and the type of eave finish. For the NIAGARA round system, the manufacturer recommends a slope of 3 mm per 1 m. In the NIAGARA square system, the recommendation depends on whether a fascia is used: no fascia, a slope of 3 mm per 1 m is recommended, whereas during assembly with a fascia, the manufacturer recommends installing the gutter horizontally, without a slope. Therefore, a single value should not be assumed to be universal for all systems and assembly options.
For example, with a 3-mm drop per meter and a 10-meter-long section of Gutter:
10 m × 3 mm/m = 30 mm
The height difference between the beginning and end of the section should therefore be 30 mm, or 3 cm. In the NIAGARA Square system installed with a fascia, however, follow the manufacturer’s recommendation for horizontal assembly without a slope. For example, with a slope of 3 mm per meter and a gutter section 10 m long:
10 m × 3 mm/m = 30 mm
The height difference between the beginning and end of the section should therefore be 30 mm, or 3 cm.
Tip! You can mark the slope using a laser level. First, mark the height of the drain, and then mark a point at the other end of the section that is the calculated value higher. Connecting these two points creates a line that indicates the required slope. For shorter sections, you can also use a long level and a shim of the appropriate thickness.
If the drain is located in the middle of the Gutter, the slope is marked on both sides toward the drain. Each of these sections then has its own highest point.
The spacing between gutter hooks should be determined in accordance with the assembly instructions for the selected system. For the NIAGARA Round and Square systems, the first hook should be located approximately 15 cm from the edge of the batten. At the point where the outlet end cap is assembled, the spacing between hooks should be at least 30 cm, while the remaining hooks should be fastened at intervals not exceeding 50–60 cm. Special attention must be paid to supporting the gutter at downspouts, joints, and changes in direction. The exact placement of the hooks should follow the instructions for the specific system variant.

The gutter system should be planned in conjunction with the method of draining water from the downpipes. Depending on the conditions on the property, the water can be:
The method of water drainage depends on soil conditions, topography, and the technical capabilities of the lot. Water should not be directed along the building’s wall in a way that causes moisture to accumulate on the facade, erodes the soil, or poses a threat to the foundation.
If water is drained to the ground surface, the pipe outlet should be located in an area that ensures safe drainage. When connecting downpipes to an underground system, however, it is necessary to ensure that the system can be cleaned and inspected.
If water is to be collected in a tank and used for watering, you must take into account the tank’s capacity and how excess water will be drained during heavy rainfall. The tank alone does not solve the problem of excess water—an overflow or other emergency drainage solution is also needed.
The NIAGARA system also offers downpipe spouts and components that allow for further drainage of rainwater.
The most common mistakes result from omitting one of the selection steps or using specifications intended for a different system. Gutters and downspouts should not be selected based solely on appearance, price, or a predetermined size.
The most common mistakes include:
Important! Proper selection requires the following steps: measuring the roof, determining the size of the roof surface, calculating the effective area, selecting the size of gutters and downspouts, determining the number and location of outlets, planning the route of the downspouts, and determining the method of water drainage. In every case, you should refer to the technical specifications of the specific system.
For simple buildings, investors can perform the calculations themselves based on the roof dimensions and the manufacturer’s specifications. For large roofs, complex geometries, numerous corners, or unusual gutter layouts, it’s a good idea to consult a designer or an experienced contractor regarding the selection. This helps minimize the risk of errors and ensures that the gutter system functions properly, even during heavy rainfall.
The number and length of gutters are determined based on the length of the eaves along which the gutter system is to be installed. For a house with a gable roof where both eaves are 10 m long, a total of 20 m of gutters is needed. The number of sections to purchase depends on the standard lengths available and the roof layout. You’ll also need to account for elbows, end caps, connectors, and downspouts.
The size of the gutters and the diameter of the downpipes are selected based on the effective roof area (EPD) corresponding to a given section of the gutter and downpipe. For a roof with a slope greater than 10°, the formula EPD = (B + H/2) × L can be used, where B is the horizontal dimension of the roof slope from the eave to the Ridge, H is the height of the roof slope, and L is the length of the eave. The result should be compared with the performance parameters of the selected gutter system. For roofs with a shallower pitch, the calculation method should be verified in the manufacturer’s documentation.
The number of downpipes depends on the effective roof area per drain outlet, the length of the gutter sections, and the capacity of the entire system. There is no single, universal number of downpipes that works for every home. For long eaves, you may want to consider an additional downspout, and for larger roof areas, a dual-downspout system may also be appropriate. The final selection should be based on calculations and the manufacturer’s technical data.
The gutter slope should be determined in accordance with the assembly instructions for the specific system. For the NIAGARA Round system, the manufacturer recommends a slope of 3 mm per 1 m. For the NIAGARA Square system with no fascia, a slope of 3 mm per 1 m is also recommended; however, during assembly with a fascia, the manufacturer recommends a horizontal layout with no slope. For example, for a 10-meter section with a slope of 3 mm per 1 meter, the height difference is 30 mm, or 3 cm.
According to the instructions for the NIAGARA Round and Square systems, the first hook should be placed approximately 15 cm from the edge of the patch. At the point where the outlet end cap is assembled, the spacing between hooks should be at least 30 cm, and the remaining hooks should be spaced no more than 50–60 cm apart. It is also important to properly support the gutter at joints and corners. During assembly, follow the instructions specific to the selected system variant.
Are you planning to perform assembly or replacement of gutters? Discover the NIAGARA gutter systems from the Blachy Pruszyński Company and find the nearest retailer where you can check out the available solutions. Find out where to buy.

Zapraszamy na cykl filmów instruktażowych o Panelach Na Rąbek. W odcinku pilotażowym przedstawimy inwestycję “Osiedle Miodowe” […]
Read morePrzed Państwem ostatni odcinek naszej serii Akademia Rzemiosła. Przez ostatnie 13 tygodni w każdą środę przedstawialiśmy […]
Read moreDobrze znany naszym widzom Artur Falkowski ponownie stanie przed kamerą, żeby podzielić się swoimi doświadczeniami i […]
Read more